The Lord's Rake Ascent

A photo guide to climbing Lord's Rake—the dramatic, scree-filled gully that breaches the towering western battlements of Scafell above Mickledore.

Location
Scafell (Mickledore)
West Face of Scafell
Terrain Type
Steep Scree Gully
Physical Demand
Strenuous Hands-On
Route Classification
Technical
Summary: While Lord's Rake is technically a steep gully ascent rather than a pure hands-on rock scramble, you will certainly need both hands and feet to negotiate its shifting terrain. The rake cuts a rising diagonal fault line across the sheer western precipices of Scafell, leading onto the high mountain plateau. Its primary challenge lies in the steep, mobile scree that constantly breaks away from the flanking crags. Follow this guide to see how each of the three ascents unfolds.
Ascending the Gully: Stage by Stage

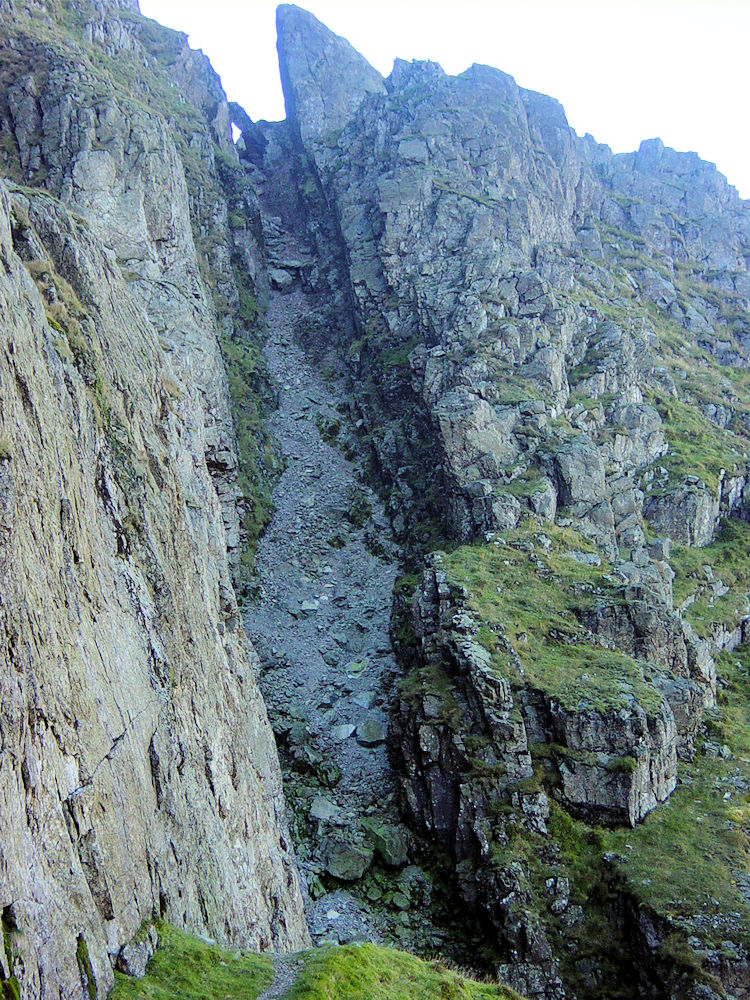
Looking up the entrance gully towards the perched chockstone boulder
The slab seen at the top has broken away
Looking up the scree gutter of Lord's Rake
The dislodged slab is not seen from this angle

It is the loose scree within the natural gutter of Lord's Rake that makes the initial pull so physically demanding. With every stride upward, the loose volcanic stones slide backward beneath your boots, forcing you to constantly fight for traction.

I have found it is best climbed by hugging the right-hand rock wall as closely as possible during the ascent. Sticking to the right offers far more opportunities to brace yourself with solid handgrips on firm rock ledges. Scrambling straight up the centre of the mobile scree chute merely doubles your effort and sends stones cascading below.

Scrambler keeping right on firm rock alongside the scree
Keeping to the easier side of the ascent
Pause on the steep slope of the rake
"I will be relieved when this is over"

Near the crest of the first ascent sits the famous fallen chockstone—a massive slab of rock that detached from the crags above years ago and wedged itself across the neck of the gully. Walkers pass carefully beneath it to gain the first col.

Once over the crest, the rake drops down slightly before starting the second of three distinct uphill pulls. This second section does not enjoy the protection of an enclosed gully wall; instead, the fellside falls away steeply to your left into the depths of Hollow Stones. A steady, well-balanced rhythm is essential here. The second pull is shorter and somewhat gentler than the first, and is negotiated easily with care.

The second stage ascent up Lord's Rake
Emerging from the final gully with magnificent views to Wast Water
The final exposed section reveals fantastic views

The third and final climb is the most exposed, with an enormous amount of vertical space dropping away to the valley floor. It can be a nerve-racking moment: on our climb, Jez decided to clamber up the steeper rock ribs on his left to avoid the final patch of scree. While his variant was much steeper, he managed well, while I simply walked directly up the scree line.

Deke and Spud followed my route up, and once the scree relented we all stepped out onto the open mountain shoulder. Reaching the top of Lord's Rake is an exhilarating triumph: the grim, enclosed shadows of the crags give way in an instant to blinding sunshine, panoramic mountain horizons, and an awe-inspiring bird's-eye view stretching down the length of Wast Water.

Advertisement

Join The Walking Englishman Community

Connect with other walkers, share trail photos, and keep up to date with my latest route notes.