Hadrian's Wall National Trail
A personal record of my walk of Hadrian's Wall National Trail with written journal and photographs. Tracklogs for GPS units and for use with Google Earth are available for download for each stage.
Journal, Photographs and Download Files
Stage 4: Chollerford to Burnhead
Google Maps Open Source Maps| Statistics and Files | ||
|---|---|---|
| Start: Chollerford | Finish: Burnhead | Distance: 15.1 miles (24.2 km) |
| Time: 6-8 hours | Climbing: 644 metres | Rating: Hard |
| GPX Route File | Google Earth File | About Chollerford |
| Statistics | |
|---|---|
| Start: Chollerford | Finish: Burnhead |
| Distance: 15.1 miles (24.2 km) | Time: 6-8 hours |
| Climbing: 644 metres | Rating: Hard |
| GPX Route File | Google Earth File |
Ordnance Survey Explorer Map (1:25,000)
Summary: Waking up in the morning we noticed the rain had arrived. Despite the weather the fourth day saw us walking on the high northern land and along the finest parts of Hadrian's Wall. It was spectacular walking, particularly the second part of the stage from Sewing Shields to Burnhead and even in the drab conditions the scenery still proved exceptionally beautiful. This days walking was an absolute treasure.
The Walk: As previously mentioned the first three days of our Hadrian's Wall walk were dry but unfortunately we woke up on the fourth day to the sound of heavy rain falling onto the roof and against the windows of our room in the Sun Inn at Acomb. I looked out of our bedroom window to see very wet conditions, heavy rain falling and water pouring down the road of the village main street. Watching the weather forecast we prepared for the worse on what was to be our most spectacular day so far on the walk, the stage with most wall to be seen on the highest levels of the whole week's walking. It had been forecast to rain but as we walked around the village last night in glorious hot sunshine we had hoped. Our hopes were dashed.
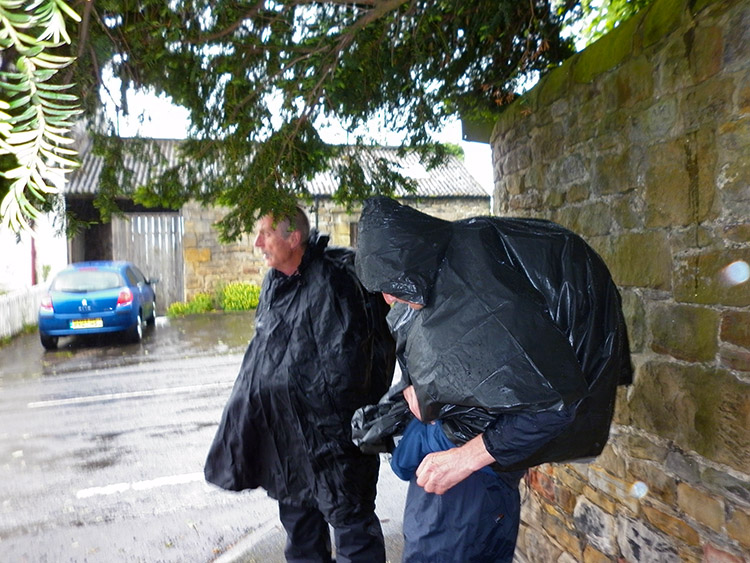 Dressed appropriately in Acomb
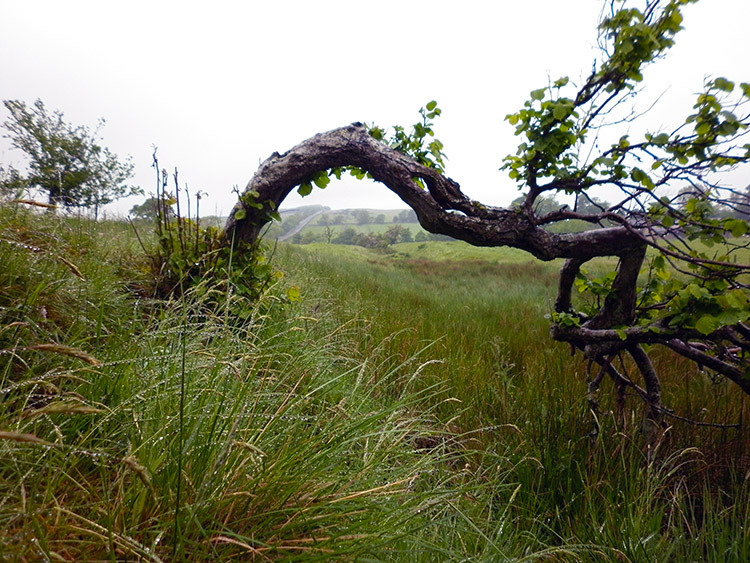 A drab day could not detract from the splendid scenery
After breakfast and checking out of the Sun Inn we walked up the main street to the bus stop and waited. It poured heavily as we stood by the bus stop. We put all of our wet gear on top of our inner layers of wet gear. Cagoules over wet weather coats. It continued to rain heavily. We continued waiting for a bus. After over an half hour waiting a bus arrived at the bus stop which was set on a turning circle at the head of the village. Alas it was going to wrong way, our intended bus was not coming up the village and so we were obliged to walk down through the village to the A6079 and continue our wait for an appropriate bus. In the pouring rain we continued to wait, too wet and too demoralised to moan. Ninety minutes after leaving the Sun Inn a bus heading in the right direction came. From disappointment on our late start to overwhelming joy. The bus driver did not charge us a fare on our bus ride from Acomb to Low Brunton near Chollerford. He simply smiled and wished us well on our journey. After using the intended fare to buy provisions at a garage shop in Chollerford in which a lady shopper humorously helped me straighten my distorted Cagoule we set off up on the footpath beside the road to Walwick and past the site of Cilvrnvm or Chesters Roman Fort before leaving the road to skirt around the grounds of Walwick Hall towards Black Carts. I knew we would resume our acquaintance with Hadrian's Wall soon as Black Carts was directly ahead on the map and I had been there before. The preamble to Black Carts was brilliant, a short walk around a delightful small copse, once the site of Milecastle 29.
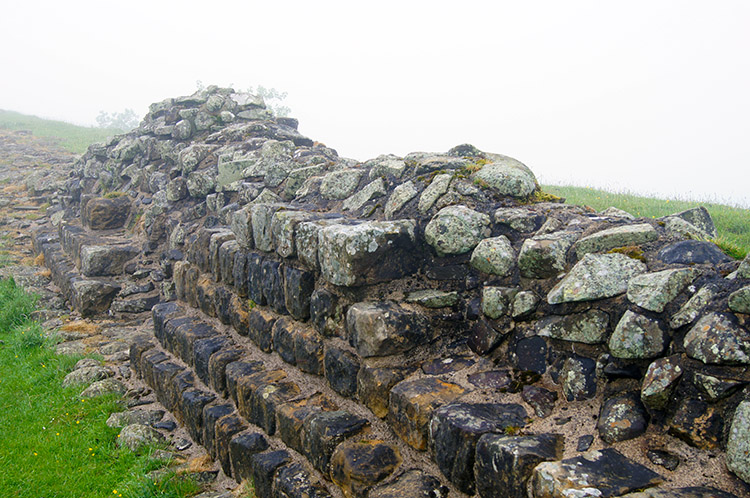
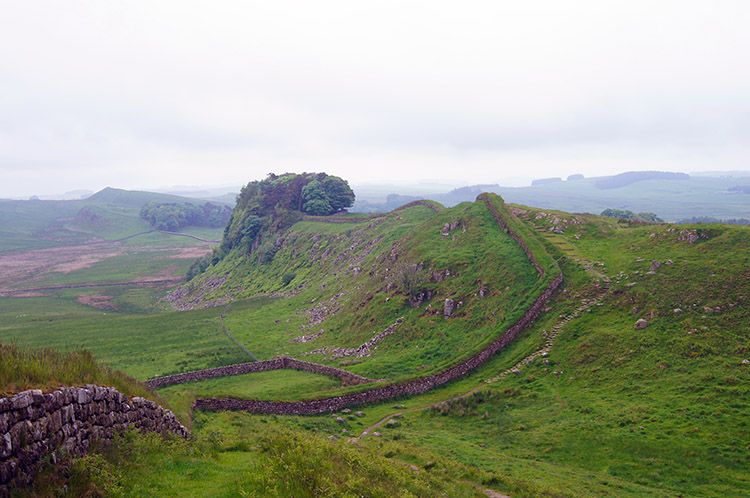
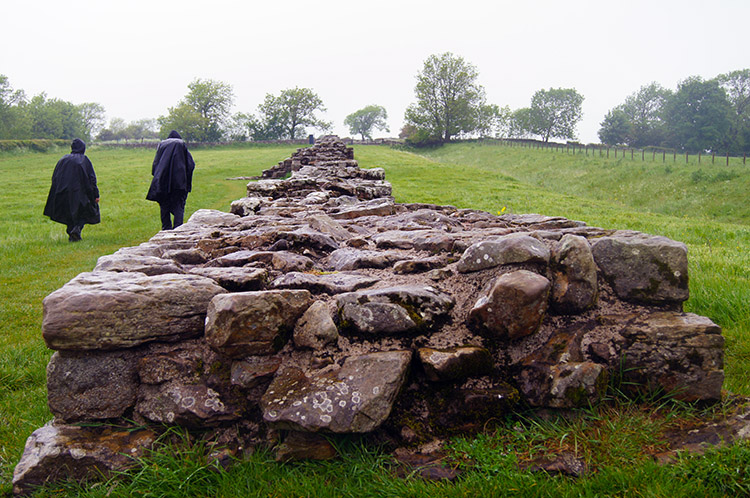 Hadrian's Wall at Black Carts
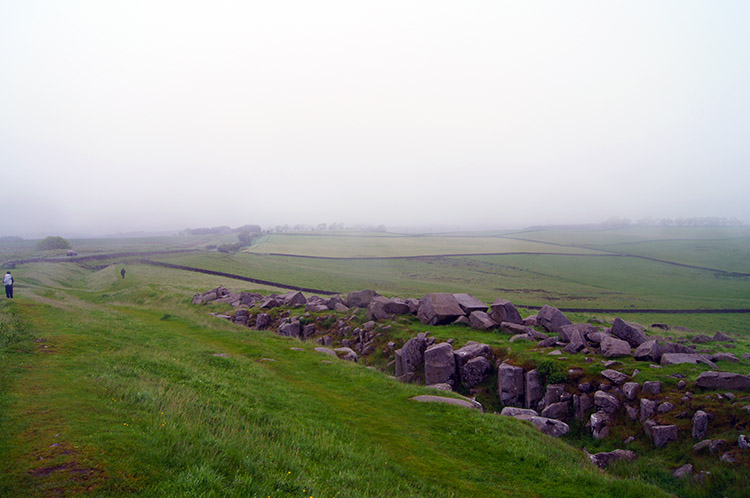 In the mist
The rain continued to fall, not as heavily as it had done in the early morning but it was still persistent and the misty conditions caused by the low cloud kept the views and our immediate thoughts entrapped in the immediate surroundings. The 460 metres of wall at Black Carts provided us with some inspiration though and after the stretch of wall was left behind us we followed a clear path on a raised bank and then beside a deep Vallum towards the next point of Roman history.
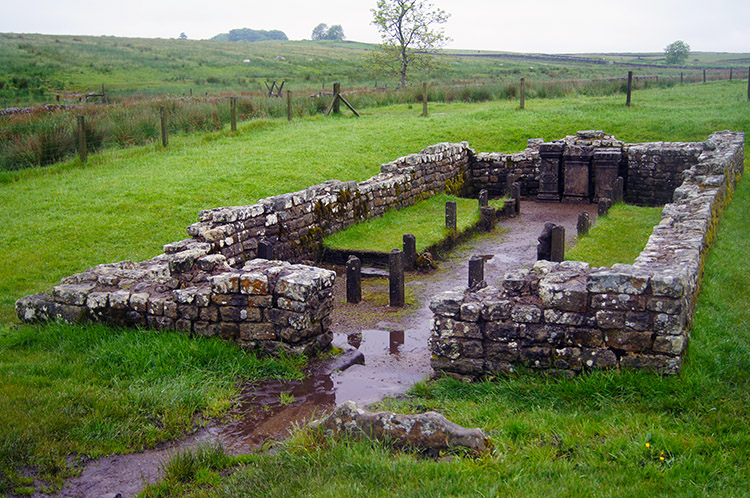 Temple at Brocoltia Roman Fort
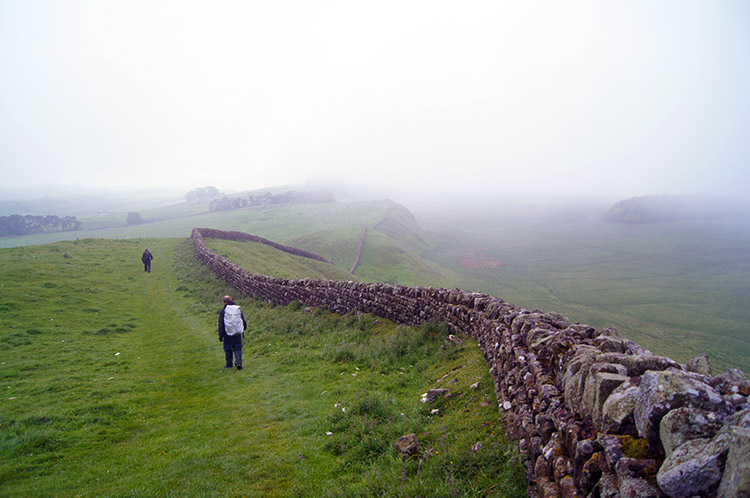
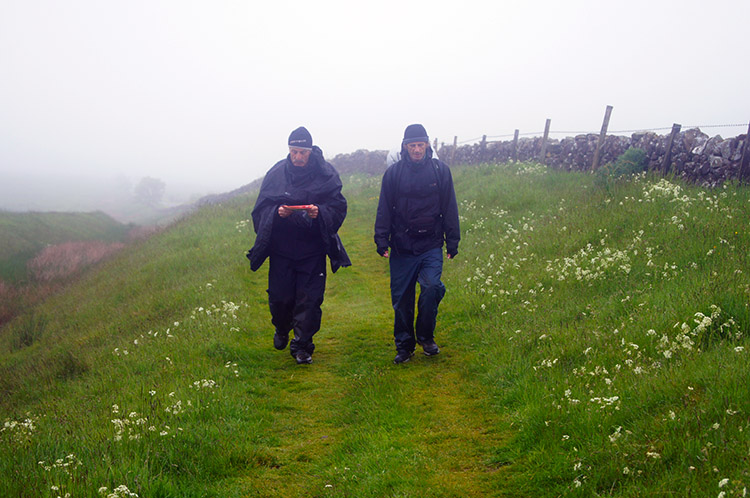 Walking beside the Vallum to Sewing Shields
That next point of interest came soon after crossing the B6318 from the north to south side. Brocoltia Roman Fort was an impressive place with splendid remains of a temple, the first preserved place of Roman worship we had seen on the walk so far. Brocoltia, literally translated as 'Badger Holes' is the most northernmost part of Hadrian's Wall and is in one of the most desolate places. The temple, of which remains good foundations, must have been a place a sanctuary in conditions much worse than the miserable ones we were experiencing. After our close inspection of the remains and storing our personal imaginations of the site we continued on by crossing to the north side of the B6318 and with it continuing to rain we took shelter for a break in a large corrugated iron covered barn at Carraw. After a 15 minute break we continued on in drizzle and mist toward Sewing Shields.
 Site of Ring and Bailey Fort at Fozy Moss
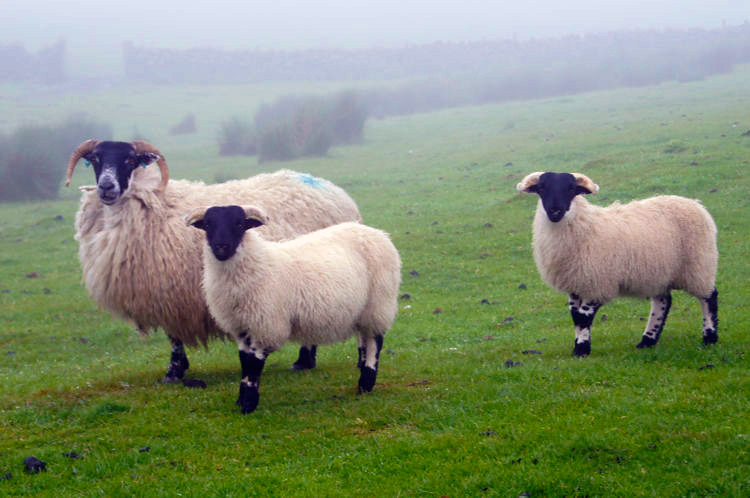 Sheep patrol Hadrian's Wall near Fozy Moss
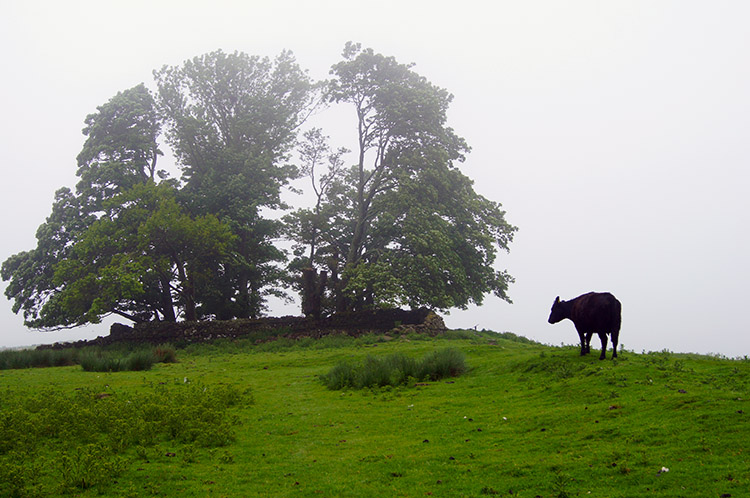
Briefly without wall to accompany us we followed the course of the raised bank and Vallum to Fozy Moss and the site of a Medieval Ring and Bailey Fort. No doubt the people who built and maintained the fort took advantage of materials nearby conveniently placed at their disposal by the Romans. The only patrols at Fozy Moss this time around were Cattle and Sheep, all watching us attentively as we passed their ground. It was near Fozy Moss that an improvement in the weather came, the drizzle abated although the low cloud hung around.
 Fantastic short woodland stroll at Sewing Shields
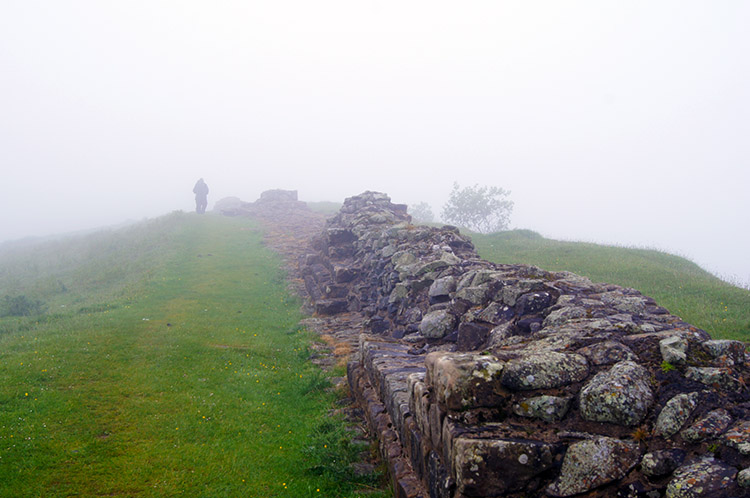 Hadrian's Wall at Sewingshields Crags
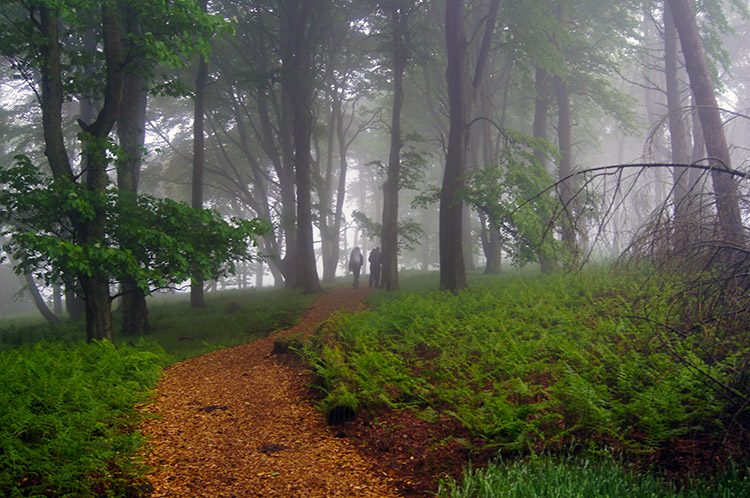
Not long after Fozy Moss we came across more sections of the wall, not continuous but not far between them. Then we came to a farmstead at Sewing Shields and just after the buildings we walked into a walled section of the most beautiful woodland imaginable when considering the high and desolate terrain all around. In the wood a herd of cattle sheltered from the drab conditions and enjoyed a wide selection of green shoots. They were not concerned by our passing thorough their wood. Once through the woodland we climbed onto Sewingshields Crags and came across a section of unbroken wall. We were now in classic Hadrian's Wall country, this section was to intermittently stretch for miles.
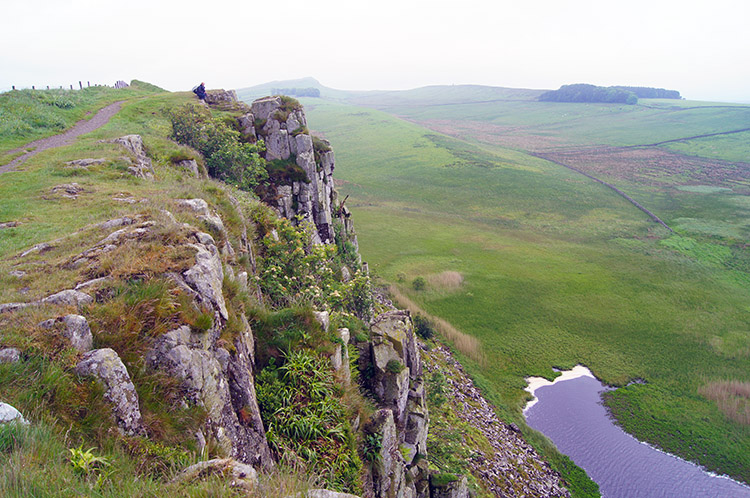
 Hadrian's Wall is of sturdy construction on Sewingshields Crags
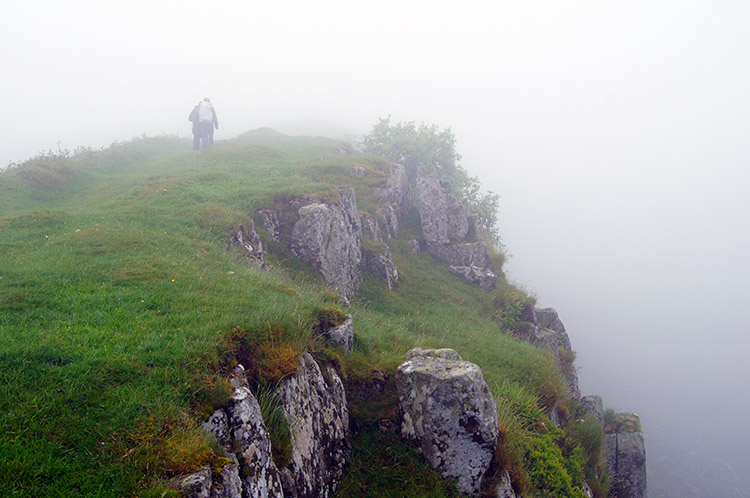 Close to the edge on Sewingshields Crags
Steve, Dave and I noticed we were now on a cliff, Sewingshields Crags being the eastern end of the Great Whin Sill. The geological marvel provided a suitable bedrock for the Roman's to build an impressive section of their great northern wall and we were now experiencing the very best of it.
 Making our way towards Housesteads
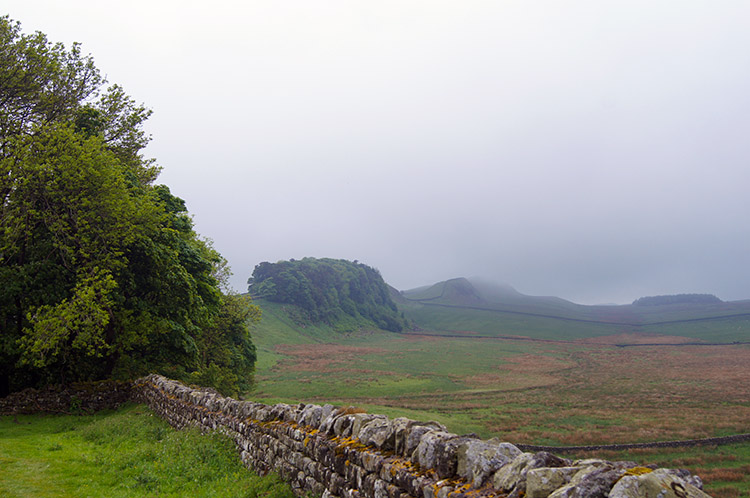 Nearing a small copse at Kennel Crags
Even in the misty conditions we could easily make out the special geography of the area by the Great Whin Sill. To our left and stretching southwards the ground fell gradually away in gentle meandering slopes. Easy walking ground for exploring. To our right and to the north we were restricted from any deviation by a sheer cliff. Below the cliff it was gloomy and dark but when the low cloud and low mist parted enough we could see the ground on average 25 metres below us. On the lower northern ground stood marshland and a couple of lakes, Broomlee Lough and Greenlee Lough. Occasionally we glimpsed them through the clag. The scene was Brontesque and dramatic though I pined to see to the north uninhibited by cloud on a clear day.
 In the copse just before Housesteads
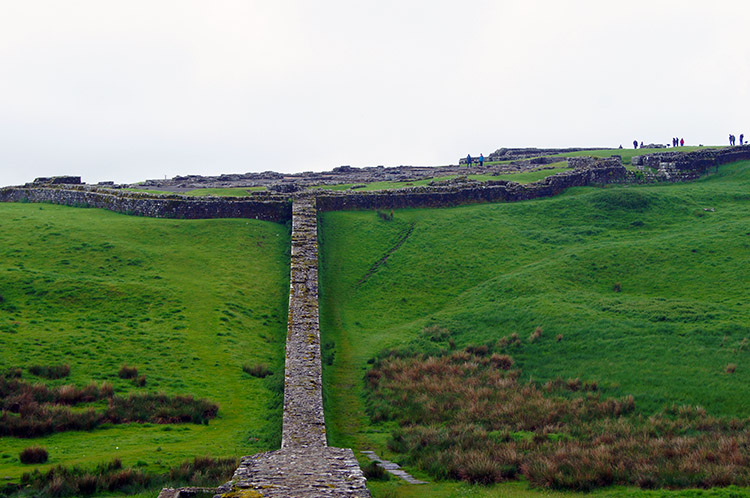 Vercovicivm Fort at Housesteads
After passing over the north side edge of Sewingshields Crags we had enjoyed a dramatic mile walking to Housesteads without really noticing the distance of travel; it had been so enjoyable and consuming. The snaking undulating wall was responsible for that, it captured constant attention and the sight was remarkable. As we had walked another phenomena happened without us really noticing. While broken cloud and sunshine was perhaps too much to ask at least the cloud had lifted and views along the wall were dramatically improving. We were to be blessed for the remainder of the days walking with the best views of Hadrian's Wall there were to be had. I preambled the brilliant experience ahead of us by making a brief inspection of Vercovicvum Fort and Housesteads while Steve and Dave took a short break in woodland at Housesteads Crags.
 Hadrian's Wall is in woodland at Housesteads Crags
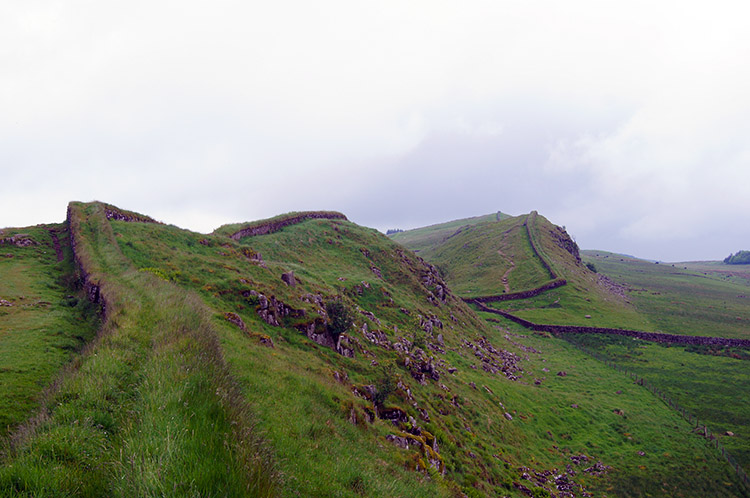 Hadrian's Wall at Cuddy's Crags and Hotbank Crags
Cloud had well and truly lifted as we resumed the walk from Housesteads and we first enjoyed a short walk through woodland before emerging into the great outdoors in the section between Housesteads Crags and Cuddy's Crags. To the west the wall stretched out majestically; there is no other word I can find. It was a fantastic sight and the path beckoned us to walk along it while enjoying the immediate wall and anticipating it beyond.
 Hadrian's Wall turns sharply at Hotbanks
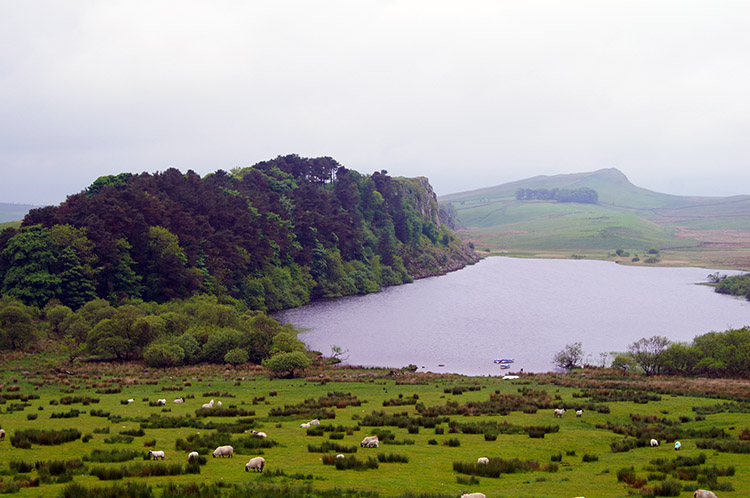 Highshield Crags and Crag Lough
We walked on and in turn passing over a line of fabulous evocative names. Cuddy's Crags, Hotbank Crags and then to Highshield Crags with Crag Lough nestled close to its south side base. Highshield Crags, unlike its predecessors was covered in a thick canopy of leaf, yet another wooded section to encounter. These tree canopy interludes were welcome breaks in the exposed landscape and all provided a dramatic barrier to sights that lie ahead. Highshield Crags was no exception.
 Highshield Crags
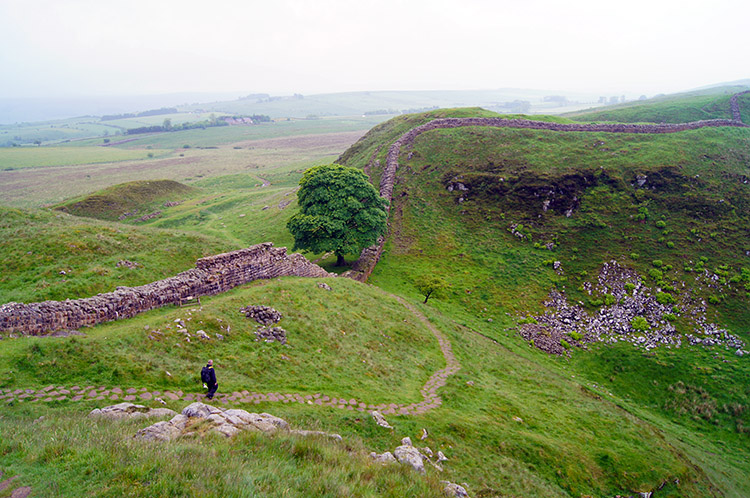 Descending to the iconic tree at Steel Rigg
Highshield Crags led us to Steel Rigg, one of the most well known parts of the walk and one of the highlights of the Great Whin Sill. It is not surprising that car parks are conveniently placed at Steel Rigg as the location offers outstanding views of the wall. There is another reason why people flock here. A Sycamore tree stands proud in a natural gap in Steel Rigg which is known as 'Robin Hood Tree' since featuring in the film Robin Hood, Price of Thieves. We walked down to the gap and to the Sycamore Tree.
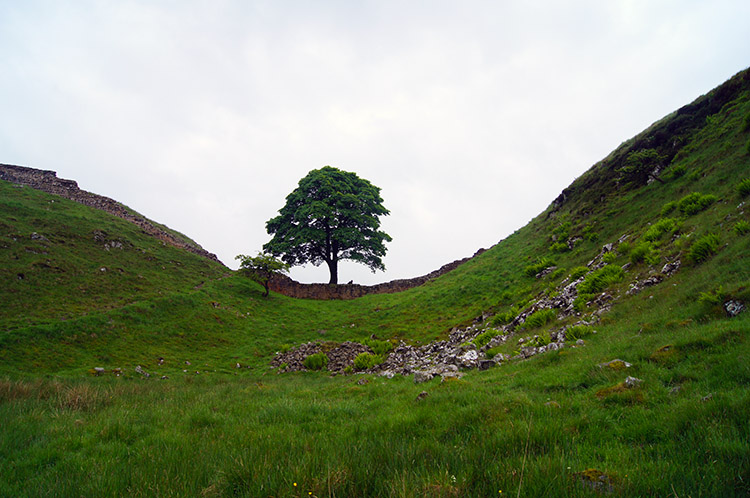 Probably the most photographed tree in Northumberland
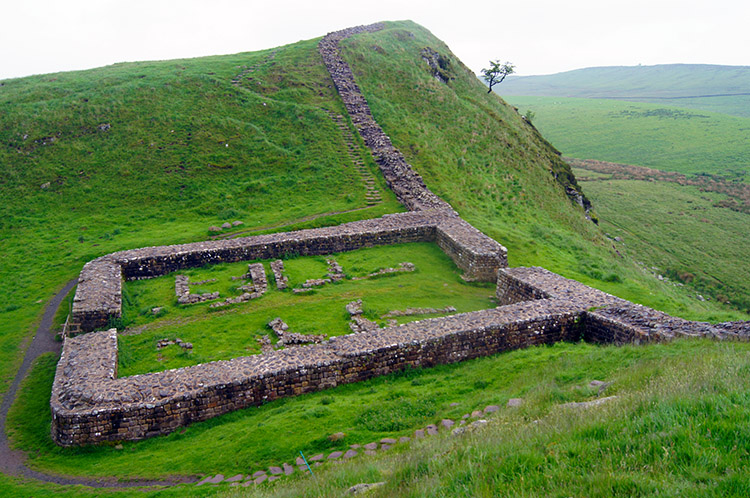 Milecastle 39 (Castle Nick)
Of course I had to walk away from the path along Hadrian's Wall and find a convenient spot to take my own photograph of the tree. As I did so Steve and Dave took the opportunity to take a final break under the tree and once my David Bailey moment was over I walked back to the boys sheltering in the now dry weather under the tree and resumed the walk westwards. Immediately after climbing from the gap sheltering the Sycamore we came across Milecastle 39, in my opinion the finest example of a milecastle on the whole walk. Like the tree it nestled in a natural gap on the Whin Sill, albeit more elevated than that of the Sycamore.
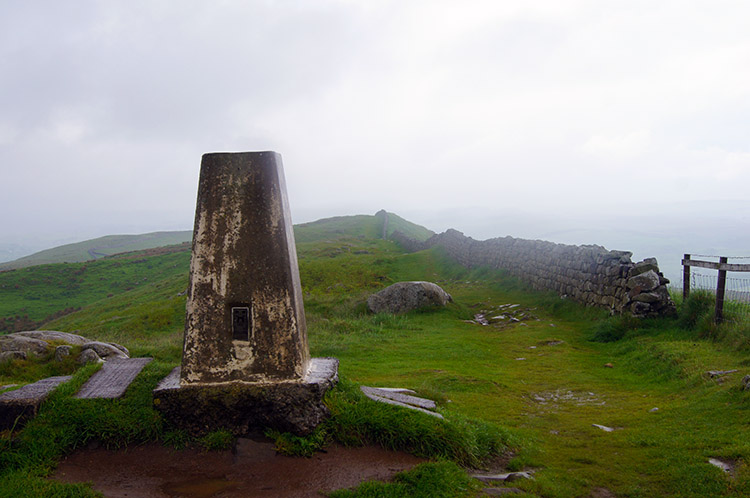 Trig point on Winshield Crags
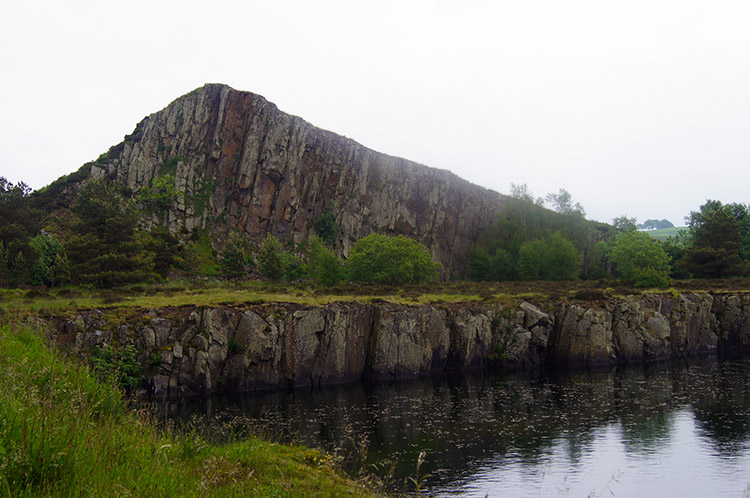 Disused quarry at Hole Gap near Burnhead
After Milecastle 39 we walked our final three miles of the day, also the final three west side miles of the Great Whin Sill and a thoroughly enjoyable three miles walking. First came the impressive raised land of Winshield Crags with its complimentary Trig point From Winshield Crags we continued walking with exquisite views ahead of us to Caw Gap and then across a road before climbing onto Cawfield Crags which proved to be the last climb on the Great Whin Sill and the last climb of the day for soon after we descended to Hole Gap and to a disused quarry at Burnhead. I reached the finish just ahead of Steve and Dave and rested on a bench while reflecting on a fantastic days walking. It was one of the best, awesome, brilliant and all similar descriptions. A remarkable days walking despite the weather. I would do it again anytime. For now though there was a walk to continue.